Rafter Layout with Log Timbers
Orienting Your Work to the Drawings
GETTING ORIENTED
Drawing #6 shows a rafter as it appears in place upon the wall.
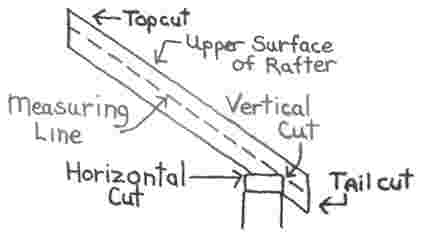
Drawing #6
Drawing #7 represents a rafter as it will appear as you are laying it out on the ground. Note that it is upside down. The upper surface of the rafter then appears in the lower part of the drawing. This can be confusing if you have never done this before. Fortunately, remembering the orientation is the most difficult part of the procedure.
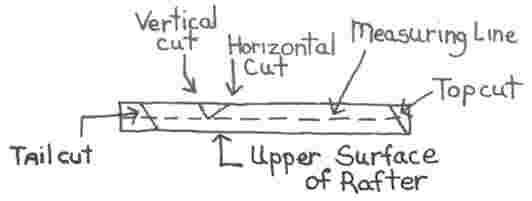
Drawing #7
It will help simplify the procedure if you position your material and orient yourself so that the rafter in the drawing and the rafter on the ground appear the same. To do this place your rafter so the upper surface, that is the surface you will be nailing your roof boards to, is the edge closest to you, as in Drawing #8 shown below.
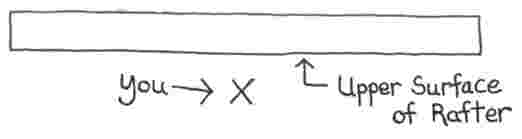
Drawing #8
If you are using log poles for rafter material you must determine where the upper surface will be. It would wise to mark this surface using your chalk line reel. Then position that line, as in Drawing #9. Secure the log so that it will not pitch or roll while you are working with it.
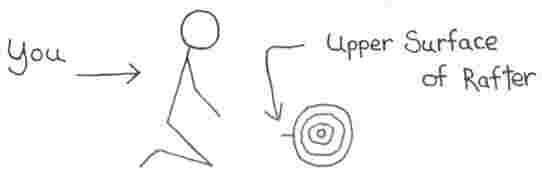
Drawing #9
Also, as you begin to lay out your rafter the top cut should be to your right and the tail cut to your left, as in Drawing #10. If the worded instructions are not immediately understood, then reference to the drawings will clear up any misunderstanding.
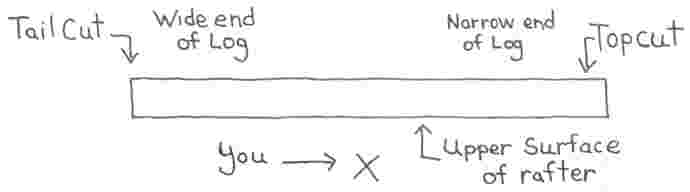
Drawing #10

