Two Ways to Use a Ridge Beam
There are two ways to use a ridge beam. Drawing #26 shows the vertical surfaces of the rafters butted to the sides of the ridge beam. Drawing #27 shows th rafters resting upon the top of the ridge beam. The first example will be for a ridge beam as in drawing #26 and the second example will be for a ridge beam as shown in drawing #27.
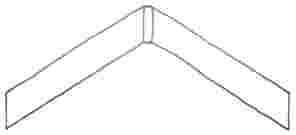
Drawing #26 |
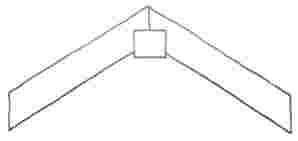 Drawing #27 |
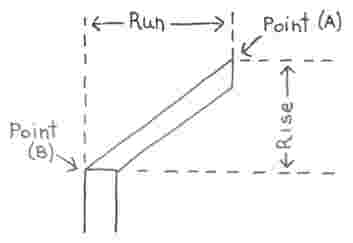
Refer to Drawings #28 and # 29, assuming that they represent two rafters with the same rise and run. Notice that in Drawing #28 the rise is equal to the distance from the plate, Point B, to the peak of the gable, Point A. In Drawing #29 the rise is less than this distance. By extending the rafter beyond the wall for the eave, we had to lift the upper surface of the rafter above the wall plate. This difference must be added to the rise when figuring how high to put your ridge beam. Referring to drawing #29, note the distance from Point B on the upper surface of the rafter, to Point C at the wall plate.
Drawing #28

Drawing #29
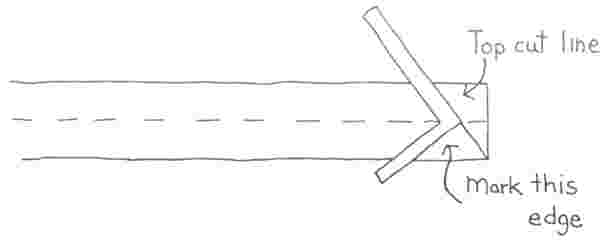
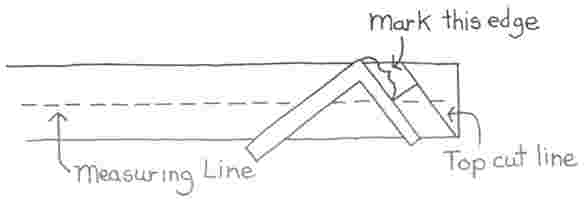
To find the distance from Point B to Point C on the rafter you are laying out, extend the vertical cut line of the rafter seat to the edge of the rafter closest to you and measure the distance from that edge to the measuring line along the diagonal, as shown in Drawing #30. That is the distance the rafters will be lifted. Add this to the rise and you know how high to put the top surface of your ridge beam.
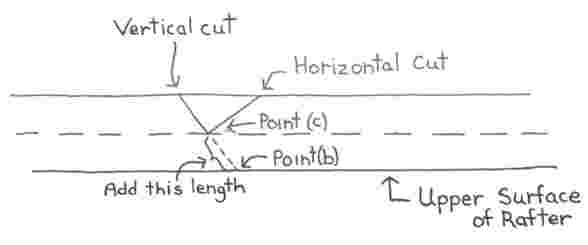
Drawing #30
You must also make an adjustment to allow for the space taken by the ridge beam between the two rafters. This is done by subtracting half the width of the ridge beam material from the vertical face of each rafter.
For example, let us say the ridge beam is 4 inches wide. That would mean 2 inches must be removed from each rafter. Mark a line perpendicular to the top cut line as shown in Drawing #31.
Drawing #31
Then, along that line mark 2 inches, or 1/2 the width of your ridge beam, whatever it may be, away from the top cut line. Refer to Drawing #32.

Drawing #32
Lay your square out so the correct RISE and RUN values on the body and tongue intersect the measuring line. Position it so the tongue also intersects the 2 inch mark just made, then draw a line down the outside edge of the tongue as in Drawing #33.

Drawing #33
This new line is now your top cut line and your rafter looks something like Drawing #34.
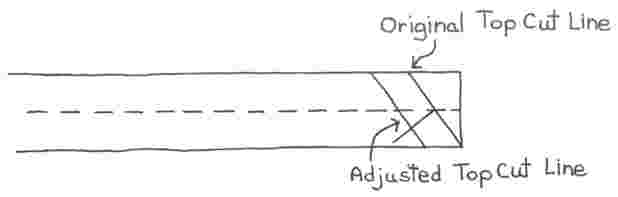
Drawing #34
EXAMPLE 2: RAFTERS RESTING ON TOP OF RIDGE BEAM
If the rafters are to rest on top of the ridge beam the length will be fine, for they still need to meet at the peak of the gable. There are two things that do need to be done however.
1:The rafter must be notched out to rest upon the ridge beam.
2:The ridge beam height must be determined accurately so the ridge beam seat will not cut too deep nor too shallow into the rafter material.
The ridge beam seat will look something like Drawing #35 when completed.
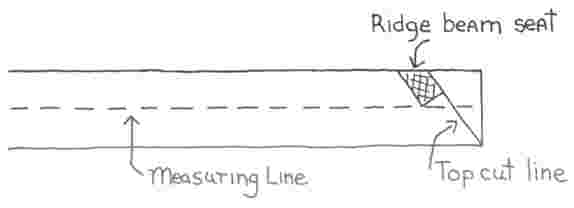
Drawing #35
The ridge beam seat must be layed out before the ridge beam height can be determined. Begin with the horizontal cut line. The horizontal cut line will be 1/2 the width of your ridge beam material. In this example assume a 4 inch ridge beam. Half that width would be 2 inches. Place the square so the 2 inch mark on the tongue intersects the measuring line. Then, align the body of the square with the top cut line and draw a mark along that edge of the square, as shown in Drawing #36. This will give you a horizontal cut line equaling 2 inches or half the width of your ridge beam.
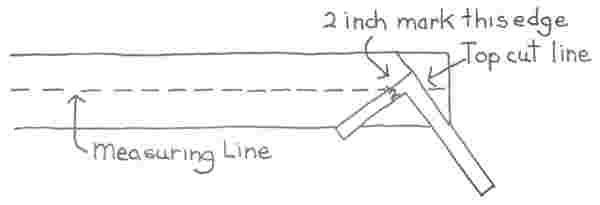
Drawing #36
To get the vertical cut line of the ridge beam seat, lay the square so the tongue and body intersect the measuring line at the values used for RISE and RUN. Place the square so the tongue intersects the point where the horizontal cut of the seat meets the measuring line. Now, mark your rafter material down the edge of the tongue as shown in Drawing #37.
Drawing #37
Having done this, your rafter should look something like the one previously shown in Drawing #35.
To establish the height at which the ridge beam must be set, measure the distance from the measuring line to the point where the horizontal cut meets the top cut line, as in Drawing #38.
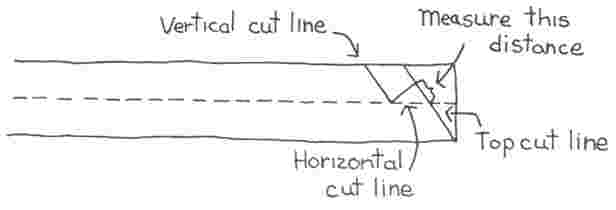
Drawing #38
Subtract that length from the rise and this is the height to put the ridge beam above the wall plate, as in Drawing #39.
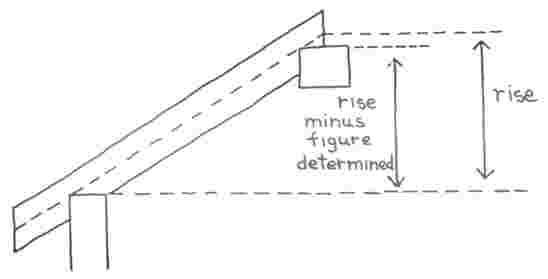
Drawing #39

