Rafter Layout with Log Timbers
Special Cases
JOINING RAFTERS WITH DIFFERING PITCH
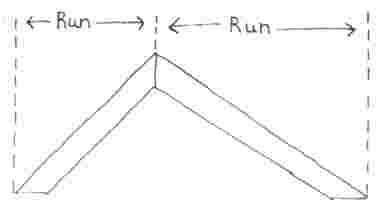
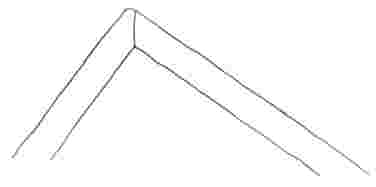
If the peak of the roof is not in the center of your structure, as in the case with many solar designs, then one side of the roof will have a longer run than the other as shown in Drawing #40.
Drawing #26 & #40
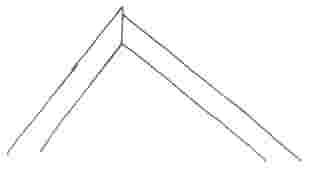
If you don't do something about it, the rafters will not line up exactly at the peak of the roof. The peak of the rafter with the shortest run will be higher than the peak of the rafter with the longer run, as in Drawing #41.
Drawing #41
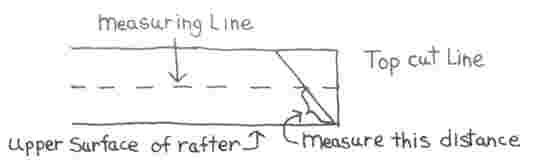
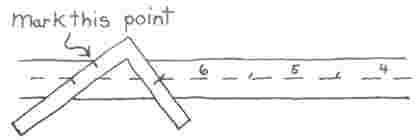
To correct for this, begin with the rafter with the longest run. Measure the distance from the point where the measuring line meets the top cut line to the point where the top cut line meets the upper surface of the fafter, as in Drawing #42.
Drawing #42
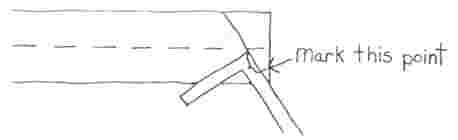
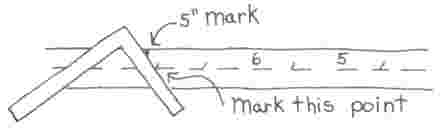
Next, go to the rafter with the shorter run. Beginning from the point where the measuring line intersects the top cut line, measure toward the upper surface of the rafter and make a mark on the top cut line the same distance as that established from the rafter with the longer run, as in Drawing #43.
Drawing #43
Then, align your square with the top cut line and mark a line perpendicular to the top cut line, as in Drawing #44.

Drawing #44
When you put your rafters in place they will look something like Drawing #45.
Drawing #45
STEPPING OFF A FRACTION OF A FOOT OF RUN
To step off a fraction of a foot of run is not as difficult as it may at first appear. Let us say we have a run of 6 feet 5 inches. To begin we would step off the 6 whole feet as described previously. Then, align the square as if to step off another whole foot of run. Instead of marking the point where the 12 on body meets the measuring line, make a mark on your rafter material where the 5 is on the outside edge of the body, as in Drawing #46.
Note: If the point to mark is not on your material then you can lay another piece of material next to the one you are laying out.
Drawing #46
Now, move the square to the left, until the tongue of the square meets the mark made in the preceeding step. Align the quare for proper RISE and RUN. Mark the point where the tongue intersects the measure line as in Drawing #47.
Drawing #47
Using this point. continue on with the layout of the rafter seat, or mark the tail cut, as described earlier.

